Showing posts with label blue. Show all posts

21 December 2011

The blue placemats are mine no more!!

remember these?

Well, it took me the better part of a year, but I managed to finally finish these guys up and send them off to the recipients. I don't think I could have moved forward into the next year if I had this project hanging over me, and I KNOW that my friend Erica is glad that I finally finished them.

So here are some of the final photos that I took of the whole set before sending them off.


20 October 2011

November BLISS block

At some point over the summer Michelle - a.k.a I Like Orange, Too, the host for the Bliss circle of do.Good Stitches, put out an entreaty for someone in our circle to step in as quilter for the month of November. For those of you not familiar with how this Flickr group operates, each of the circles in this charity bee has a combination of "quilters" and "stitchers." The quilters are each responsible for choosing the design for the group's quilt 2-3 months during the year, communicating during that month with the rest of their circle, and piecing together the blocks he/she receives, then quilting and binding the piece before sending it to that circle's designated charity. Stitchers, on the other hand, are simply responsible for putting together (generally) 2 blocks each month and sending them off to that month's quilter. I joined the group as a stitcher, knowing my dislike for actually quilting things! However, after several weeks passed and no one else had expressed an ability to step in for November, I decided to challenge myself and commit a little bit more to this group. And that is how I have come to be next month's quilter for the Bliss circle.

I've decided to go with a relatively easy block to piece, leaving size and details flexible, but with specific colors and general style.

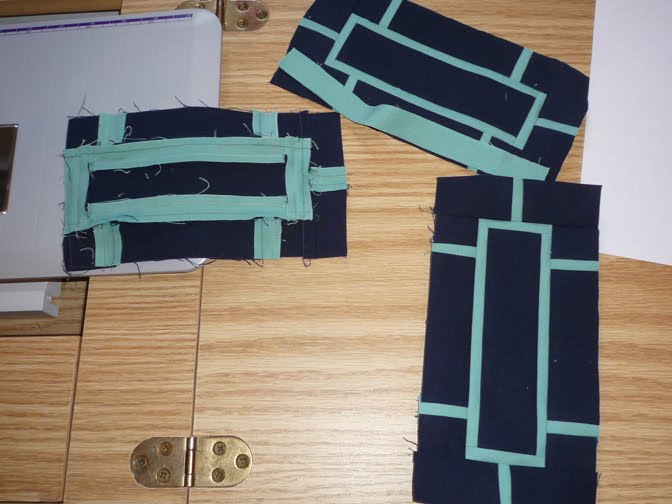
I'm looking for the equivalent of two 12" blocks (in the photo above I have one 12" block, one 8" block and two 4" blocks... or, say, four 6" blocks = one 12" block, but no need to be too precise). Please use a solid in any shade of orange, blue or aqua as the background, and prints in the opposite color PLUS black and white prints for the pieced strip going through your block.

Here's a quick little tute on how I did these guys:

I started by selecting a group of background color options, and scraps in blues, oranges and B/W.


Cut your backgrounds into squares or rectangles that are approximately the desired size of your finished block

Selecting from your scraps, start piecing a strip using a single color story mixed with your B/W. Your strip can be anywhere from 1" to about 3" wide, depending on the finished size of the block. Don't worry about being exact as you'll be trimming the edges once you have the strip to the appropriate length.

(I find it easiest to chain piece, so I was working on all 4 strips at the same time, but you can see that each one stays with being EITHER orange OR blue.)
Continue piecing your scrappy strip until it reaches about 1/2" to 1" longer than your background piece. If you are going to piece it in at an angle, make sure you allow for the extra length for that.
As I was approaching the lengths of my background pieces, I simply held the strips up against them to "measure." Oh, and I don't think I have yet mentioned - please pair the pieced strip with a background of its complimentary color (blue with orange and vice-versa). When you have that complete, press your seams in one direction. Trim up the edges of the strip so they are even.

Next, make a slice through your background, where you plan to add the strip.


Piece them together, press seam allowances toward the background and trim.


And if the finished product ends up a little bit off from the dimensions you were aiming for, no worries. I'm figuring that I'll be putting some filler in to make up for gaps in irregular sizes - I only ask that you trim to square or rectangular, with 90-degree corners, not wonky.

I hope everyone has fun with these guys! If you have any questions at all, or need clarification, just let me know. And thanks to the ladies of the Bliss circle for bearing with me on my first venture as a quilter (in this context!). I look forward to seeing what everyone comes up with!

05 September 2011

Lots of Little Pebbles

So, the saga of the blue place mats continues, though it's coming together with positive results. As you all may recall, once I finally came up with a solution for the piecework, after quite a journey, the next step was to figure out how I would quilt these guys. I drew a few sketches in my notebook, and decided to try slightly wonky, echoed circles mimicking the print on the border, but at a much larger scale.
Not only did I have trouble doing freehand circles at that scale (especially working at my machine on my dining table, so I only had the throat of the machine as a working surface), but I felt that the motif felt a little too juvenile for the design of the place mats at this stage. Back to the drawing board (quite literally). I still liked the idea of circles, and decided to try my hand at pebble quilting. And how effective it is!!
However, it is also extremely intense on both one's concentration and the muscles from the neck, shoulders and down to the fingers. I find I need to take a break just about every 15 minutes or so, otherwise I start getting sloppy, and it shows! This also requires a LOT of thread! I love how the variegated thread looks with these place mats - I went with Sulky Blendables and am very happy with the outcome. However, these come in 500m spools, and I am about to start on my 3rd spool after quilting just 5 of the 8 mats. Each one is using up about 3 bobbins! I've quilted whole crib quilts with under 2 bobbins' worth of thread!! But darn it, it's going to be worth it when they're done, right??

17 August 2011

The saga of the blue place mats

Many, many months ago a friend contacted me about making some placemats for her to give as a host(ess) gift to her brother and his partner. She did not specify a "need-by" date, which unfortunately for me means that it ends up getting pushed from the forefront of my project list more often than not. What she DID give me is a link to photographs of their kitchen and home, which had been published in a major design publication! (I probably shouldn't divulge until the set is actually finished, out of my hands and hopefully in the home of the intended recipients). Trying to work from these photos had slightly contradictory results for me: 1.) There was the added impetus to get going and whip up something fabulous to compliment this already beautiful space,
2.) But with that added pressure (totally self-inflicted, mind you) I would start going in one direction, then deem it unworthy and start over again. This happened at least 4 times.

Too dark, not to mention a bit too conservative and "strict".


A design I was very interested in, but had trouble feeling that it was coming together cohesively, so I abandoned it (for the time being).

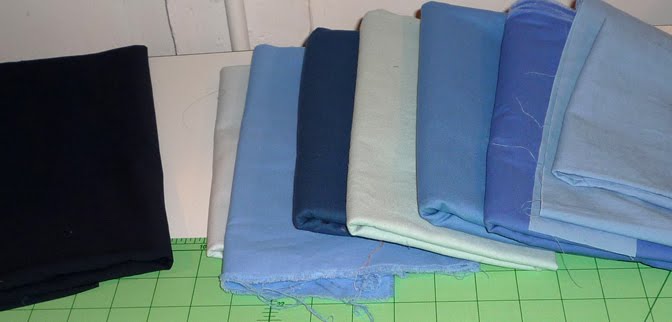
After beginning to work with more solids, I started pulling these various blues to compliment the photos of the kitchen I saw... My next attempt was WAY beyond my skill level... a 1-patch herringbone design to mimic the brickwork in their kitchen, but my Y-seams were AWFUL! I couldn't even finish 2 mats, much less all 8!

But, I now have 8 pieced tops for placemats (and 2-3 possibilities for backings) that I am happy with, and would be almost proud to submit for this project.


Next step is to figure out how I am going to quilt these puppies! I am hoping the folks in the Flickr group How Should I Quilt This?come up with some better suggestions than I've had run through my mind!


Right now I'm leaning toward either a loose cross-hatching (more random than measured) or just going with vertical lines at various increments. Regardless of what I choose, I am imposing a deadline... Erica is due to visit Portland at the beginning of September, and I plan to have them finished enough to show her (binding may or may not be complete) in person before sending them off. She's been too lenient on me!

13 June 2011

get to business!

A couple of months ago a friend of mine approached me about making a set of place mats for her to give as a gift to her brother and his partner. Knowing a little bit about the couple for whom they are intended, my self-editing, over-analyzing side went into overdrive. I started one project


and then another


but neither quite worked for me. At least not after studying the photos of their home that were published in an issue of House Beautiful Magazine.

So, I went back to the drawing board, quite literally, and worked on a design that found a happy medium between those two false starts, and had already settled on the one focus fabric, but decided to use only solids to compliment it, and create the full design.


I don't want to get ahead of myself, but I finally think I'm on the right track. Gonna try to get further along with these before setting anything in stone (or even posting new pics to my friend), but hope to have more to share in a couple of weeks.