Cutting and piecing equilateral triangles (a.k.a. 60° triangles) is actually quite a bit easier than it would appear, and such an effective look for the effort.
For this tutorial I'm going to throw a wrench in that, and offer a variation to spice it up just a bit more. I'm going to show you an easy way to transform some of your triangle patches into a mini pyramid of 4 triangles, and how you can adjust for almost any sized patch.
So, beginning with the basics, for pieced equilateral triangles begin with strips of your selected fabrics cut at any comfortable width. Just keep in mind that the sides of the triangle are going to be longer than the measurement from the top point to the middle of the bottom side (the cut width of the original strip), and you will lose about 3/4" - 7/8" of width to seam allowances in the finished rows.
For my project, I began with strips at 5 1/2" wide, which gave me triangle edges 6 1/4" long on each side.
For the mini pyramid blocks you will want to match the measurements of the original raw patch, before seam allowances, so for this I was aiming to get a pieced pyramid block that also measures 5 1/2" from top point to center of base (height), with the edges measuring 6 1/4" raw (length).
The math for figuring this out is actually extremely simple... you just need to divide the height by 2, and add 1/4" for seam allowance in order to get the height of the smaller cut pieces. For my project, to reach a finished pyramid block with a height of 5 1/2" I cut 4 triangles with 3" heights. (half of 5 1/2 = 2 3/4 + 1/4 = 3)
Now, if you started with triangle patches that measured 4" in height before piecing, then you would want to cut your pyramid triangles 2 1/4" in height (2 + 1/4 = 2 1/4), or if you start with 7 1/4" triangles, your smaller guys will be cut at 3 7/8" height (3 5/8 + 1/4 = 3 7/8).
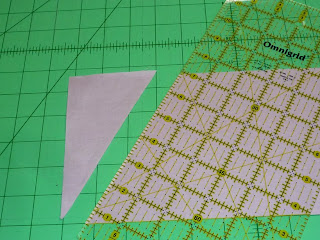
Oh, and do you all know how to cut your 60° angles?? If you have an Omnigrid, Olfa or Creative Grids rotary ruler they will include guide lines not only for the 90° parallel and perpendicular cuts, but also for 45°, 30° and 60° cuts, in relation to the straight edge of the ruler. To get your first angle cut, lay out the strip of your fabric on your cutting mat, then line up the 60° guide along the bottom of your strip so that the edge of your ruler cuts a swath across the end of your fabric strip, from the lower corner up to the top edge, approximately 2-3 inches in (depending on the width of your fabric strip).
After that first cut, rotate your ruler so that one of the 60° guides matches up to the cut edge, and the opposite edge of the ruler runs across the strip in the other direction.
Voila!
Okay, back to the tutorial at hand... once you have your 4 selected mini triangles for the pyramid block, lay them out in the desired order.
We are going to start by piecing the 3 triangles that make up the base of the pyramid. Working from left to right, take the first two triangles.Lay the middle one upside down (Right Sides Together) on top of the left one, matching all of the edges.
Sew a 1/4" seam along that right edge, from the top point.
Press open, with seam allowance to one side. At this stage you may just finger press, but I prefer to use an iron for a crisper seam and a bit more accuracy. Just be sure not to push too hard and stretch the bias edges of those triangles out of whack!
Next, take your last base triangle and lay it RST over the center patch, again matching edges and that top point (no offsetting necessary!)You'll notice that you get the little tails of the previous triangle points peeking out just a 1/4".
Stitch along the outside edge with a 1/4" seam allowance.
Press open, again with seam allowances going in the same direction as before.
Now take the top triangle and place it RST over the base, matching the edge at the top with the long edge of the center triangle. This is where those little triangle point tails come in really handy for alignment!
Stitch the two parts together along that top edge.
Press top triangle upward, leaving the seam allowance in the same direction, lying flat.
Trim off the little points if you like (though they are so small and not terribly bulky, so it's not a necessary step). Now you have a pyramid patch the same size as your other un-sewn 60° patches, so it can be used interchangeably within the rest of your composition.
Enjoy, and please let me know what you think!!


Thank you for making this useful tutorial, I was unable to buy an equilateral triangle ruler today. So next time I see one I will buy it. I did manage to get a 12 1/2 inch square ruler which I had been looking for.
ReplyDeleteJosie
No question that having the variety of tools helps tremendously, but I tend to use my 6" x 12" and 6" x 24" rulers almost all of the time, so gearing these instructions toward those made sense to me! Glad you liked the tutorial!
DeleteGreat Tut, Linda! :)
ReplyDeleteThanks, Jenn!
Delete